ASME B107.17:2020 pdf download Gages and Mandrels for Wrench Openings
scOPE
This Standard establishes final inspection gage sizesand test mandrel sizes for wrench openings and sparkplug wrench openings for inch and metric sizes.This Stan-dard does not cover every available size, only those mostcommonly manufactured.
2 APPLICATION
The gages covered by this Standard shall be used toensure the manufacture of conforming products in inchand metric sizes.
3 REFERENCES
The following document is referenced in this Standard.The latest edition shall be used.
ASTM E18,Standard Test Methods for Rockwell Hardnessof Metallic Materials
Publisher: American Society for Testing and Materials(ASTM International),100 Barr Harbor Drive,P.O.Box c7o0,West Conshohocken,PA 19428-2959(www.astm.org)
4 REQUIREMENTS
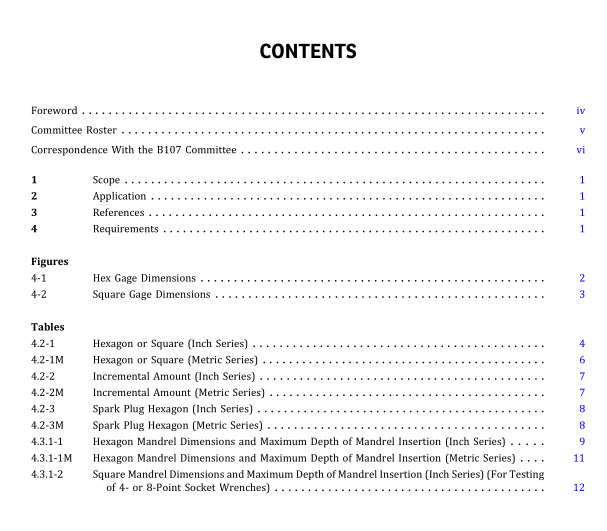
The gages shall be similar to those shown in Figure 4-1for hex gages and Figure 4-2 for square gages.Dimensionsin inch series tables are in inches, and dimensions inmetric series tables are in millimeters,except as specified.4.1 Material
4.1.1 Gages.The gages shall be made of steel, suitablefor the purpose intended, and hardened to 60 HRCminimum. The hardness shall be tested using proceduresoutlined in ASTM E18.
4.1.2 Mandrels. The mandrels shall be made of steel,suitable for the purpose intended,and hardened to 56HRCminimum.The hardness shall be tested using proceduresoutlined in ASTM E18.
4.2 Gage Use and Design
The gages shall be of the sizes and tolerances given inTables4.2-1。4.2-1M,4.2-2,4.2-2M,4.2-3,and 4.2-3M.Formulas are provided for sizes not listed.
The gages shall be used in accordance with acceptedpractices. Manufacturers may use gages with tighterdimensions than those shown herein.
The size for all limits (GO and NO Go) gages shall notexceed the extreme limits specified herein.All variations(manufacturing tolerance, calibration error, wear allow-ance, etc.) in the gages, whatever their cause or purpose,shall bring these gages within the extreme limits of thegage size specified within this Standard.Thus a gagethat represents a minimum limit may be larger, butnever smaller, than the minimum size specified; likewise,the gage that represents a maximum limit may be smaller,but never larger, than the maximum size specified.4.2.1 Rounding Method. A rounding method shall beused for determining dimensions for gages. When the nextdigit beyond the last digit to be retained is
(a) less than 5, the last digit to be retained is notchanged
by 5 or more, the last digit to be retained is increasedby one
4.3 Mandrels Use and Design
4.3.1 Mandrels for Nut End Socket Openings. Thehexagon mandrels shall be of the size and tolerancesgiven in Tables 4.3.1-1 and 4.3.1-1M.The square mandrelsshall be of the size and tolerance given in Table 4.3.1-2.Themandrel shall be inserted into the nut end socket openingto the depth indicated in the applicable table.
4.3.2 Mandrels for Wrench Openings.The hexagonmandrels shall be of the size and tolerances given inTables 4.3.1-1,4.3.1-1M, and 4.3.1-2.The mandrel shallbe fully engaged to the thickness of the wrench head.
ASME B107.17:2020 pdf download
