ASME B5.50:2009 pdf download 7/24 Taper Tool to Spindle Connection for Automatic Tool Change
1GENERAL1.1 Scope
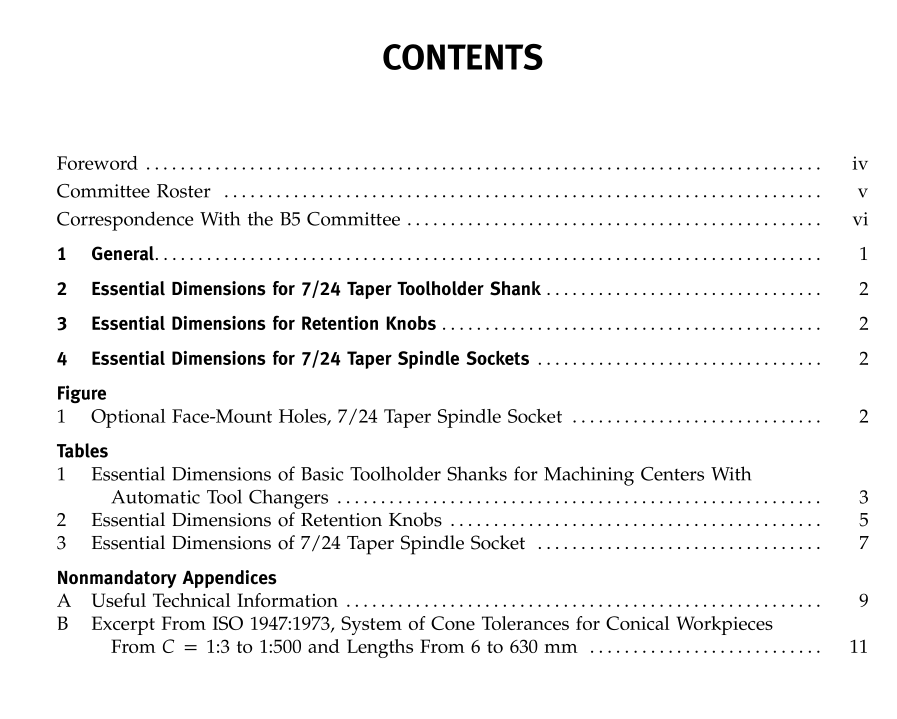
This Standard pertains to the standardization of basictoolholder shank, retention knob, and socket assembliesfor numerically controlled machining centers with auto-matic tool changers. The requirements contained hereinare intended to provide toolholder interchangeabilitybetween machining centers with automatic tool chang-ers of various types. This Standard is the inch solutionfor basic toolholder shank, retention knob, and socketassemblies. This design specifies an interchangeableretention knob with a 45-deg clamping surface.
Section 2 of this Standard specifies the dimensionsand tolerances of toolholder shanks having 7 /24 tapersintended for automatic tool change. These are intendedfor use with the corresponding basic retention knob andspindle sockets specified in sections 3 and 4 (see Table 1).Section 3 contains information for standardization ofretention knobs for use with the7 /24 connection systemdescribed herein (see Table 2).
Section 4 specifies the dimensions and tolerances ofspindle sockets, drive keys, and key seats for machinetool spindles having 7/24 tapers intended for automatictool change (see Table 3 and Fig.1).These are intendedfor use with the corresponding basic toolholder shankand retention knob specified in sections 2 and 3.
1.2 Noninterchangeability
Tool shanks conforming to ASME B5.18-1972 andASME B5.40-1977 are not interchangeable with toolshanks established in this Standard.Tool shanks con-forming to ISo 7388-1:1983 and retention knobISO 7388-2:1984 types “A” and”B” are not interchange-able with this Standard. This also applies to additionalshank and knob designs that are in the draft stageswithin the ISO standards development system.Accord-ingly,the reader should note the warning statementincluded with the retention knob specifications shownin Table 2.
Some incompatibility with existing automatic toolchange arms may arise from dimension M (Table 1).1.3 Classification
This Standard covers a basic toolholder shank withan “inch” threaded retention knob with 45-deg clampingsurface that is applicable to general-purpose machining
centers where loading and exchange of toolholders isaccomplished by automatic means.The termgeneral purpose is intended to differentiate betweenmachine designs for unusually high accuracy require-ments or designs intended to function with exception-ally high spindle rotational speeds coupled with higheraxis feed rates, such as is normally found in high-speedmachining. Tool shanks made to this Standard may beused with a variety of proprietary retention and / orflange locking systems.
1.4Definitions
Terms relevant to this Standard and its applicationare as follows:
atoniatic tool changer (ATC): mechanism for the transferof the toolholder between a storage feature and the spin-dle or nonrotating socket.
balance: when the mass centerline and rotational center-line of a rotor are coincident.
basic cone: geometrically ideal conical surface that isgiven by its geometrical dimensions.These are a basiccone diameter, the basic cone length, and the basic rateof taper, or the basic cone angle.
basic toolholder shank: unit that fits directly into the spin-dle or nonrotating socket of the machine and has provi-sion for automatic tool change.
coolant hole: passage through the center of the retentionknob that allows through-the-spindle coolant to pass.This hole also permits access to a tool set height adjust-ment screw if so equipped.
drive key: device intended to assist in delivery of thedriving torque from the spindle nose to the tool.
effective case: depth within a metal part, measured fromthe part’s surface, where the minimum required hard-ness is present.
retention knob: member of the toolholder retention sys-tem that provides a coupling point between the tool-holder taper and the spindle drawbar.
spindle: component assembly of the machine tool, thefunction of which is to accept the basic toolholder shank.spindle nose: the part of a spindle into which the toolshank is accepted.
tool angular orientation: mechanical feature to positionand retain the basic toolholder shank in a specific angu-lar relationship to the spindle or nonrotating socket.tool shank: the part of a tool which mates with the taperin the spindle nose.
1.5 References
1.5.1 The following is a list of publications refer-enced in this Standard.
ASME B5.18-1972,Spindle Noses and Tool Shanks forMilling Machines
ASME B5.40-1977 ,Spindle Noses and Tool Shanks forHorizontal Boring Machines
ASME Y14.5-2009,Dimensioning and TolerancingPublisher: The American Society of MechanicalEngineers (ASME),Three Park Avenue,New York,NY 10016-5990; Order Department: 22 Law Drive, Box2300,Fairfield,NJ 07007-2300 (www.asme.org)
ISO 1940-1:2003,Mechanical vibration — Balance qual-ity requirements for rotors in a constant(rigid) state—Part i: Specification and verification of balancetolerances
ISO 1940-2:1997,Mechanical vibration – Balance qual-ity requirements of rigid rotors — Part 2: Balanceerrors
ISO 1947:1973 (withdrawn),System of cone tolerancesfor conical workpieces from c = 1:3 to 1:500 andlengths from 6 to 630 mm
ISO 7388-1:2007,Tool shanks with 7/24 taper for auto-matic tool changers —— Part 1: Dimensions and desig-nation of shanks of forms A,AD,AF,U,UD and UF
ASME B5.50:2009 pdf download
